Undercut Structures and Sidewall Roughness
XE-3DM
The XE-3DM metrology AFM incorporates the decoupled scanner configuration. Because the Z scanner is independent of the XY scanner, it can be intentionally tilted with respect to the XY plane. By this mean, the cantilever tip can easily reach the sidewall and undercut structure.

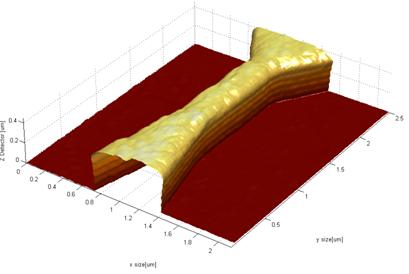
Figure 1. A undercut structure imaged by XE-3DM, showing standing wave at the side wall
Except for the tilting Z scanner, this new 3D AFM operates in the same way as regular AFM, so it can take advantage of standard super sharp cantilever tips, instead of blunt flared tips for imaging. This makes it an ideal system for high resolution sidewall roughness measurements with significantly reduced blind spots near the bottom corner areas.
|
|

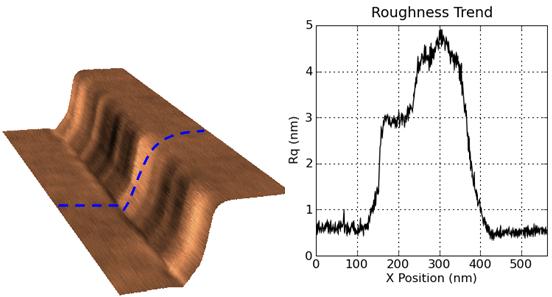
Figure 2. Photoresist sidewall roughness measurement. (A), A 3D AFM image of a photoresist sample showing three different region: top surface, sidewall, and bottom surface; (B) measured roughness versus the position cross the sample surface showing different surface roughness for different region
